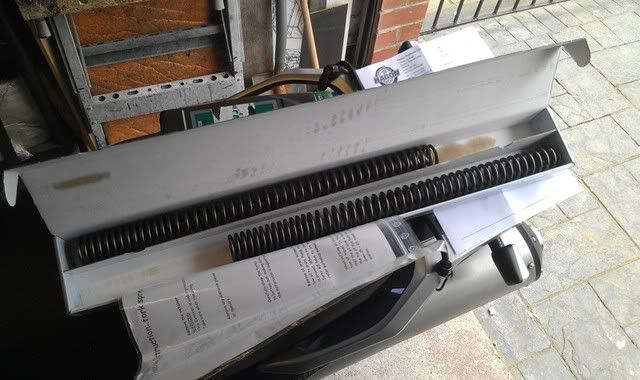
Author Topic: KevShek' DL1000 K3 - with Mods & How To's  (Read 36128 times)

0 Members and 2 Guests are viewing this topic.

Offline Gassoon

  • Quotes Museum Curator & Moderator
  • Member
  • ****
  • Joined: Jan 2010
  • Posts: 8183
  • Bike: DL650X L7
  • Location: Tyneside
Re: KevShek' DL1000 K3 - with Mods & How To's
« Reply #60 on: April 12, 2012, 17:17:25 »
(If you can wait a bit, markie, he'll probably end up making a screen himself, mate! Wait for the How To photos...) :)  :thumb:
"I am a dignified citizen of the area, not a fox-faced vagabond in an over-fancy hat!"

Work Experience Stasi


Offline kevshek

  • Member
  • ***
  • Joined: Feb 2012
  • Posts: 320
Re: KevShek' DL1000 K3 - with Mods & How To's
« Reply #61 on: April 12, 2012, 18:09:35 »
lol
If you mod it, They will come!
My current bike HERE.
My Old Vee

Offline ringo grumio nibbler

  • Member
  • ***
  • Joined: Mar 2012
  • Posts: 178
Re: KevShek' DL1000 K3 - with Mods & How To's
« Reply #62 on: April 12, 2012, 21:16:29 »
Quote from: "kevshek"
Thanks mate, rather than post them all over the forum, people can see what I've done in the first post, then read and get tip in the following posts. Speaking of which, Aftermarket mirros today!
Let me know next time you're planning a trip down to this area. I'd like to take a look at those mods first hand. Great work.

Offline kevshek

  • Member
  • ***
  • Joined: Feb 2012
  • Posts: 320
Re: KevShek' DL1000 K3 - with Mods & How To's
« Reply #63 on: April 12, 2012, 23:35:18 »
Will do, maybe when the weather's a bit nicer and they aren't ripping your eyes out for petrol at the pumps!
If you mod it, They will come!
My current bike HERE.
My Old Vee

Offline kevshek

  • Member
  • ***
  • Joined: Feb 2012
  • Posts: 320
Re: KevShek' DL1000 K3 - with Mods & How To's
« Reply #64 on: April 14, 2012, 13:46:34 »
Aye, its ganna be a busy sunday/monday I reckon. Ill try to do a write up, but getting it done and done properly takes priority.

Hagon Front Springs


Hyperpro Rear Spring
If you mod it, They will come!
My current bike HERE.
My Old Vee

Offline kevshek

  • Member
  • ***
  • Joined: Feb 2012
  • Posts: 320
Re: KevShek' DL1000 K3 - with Mods & How To's
« Reply #65 on: April 15, 2012, 20:40:09 »
15) Hagon Front Springs

So heres the kit ordered from Hagon. 2 Springs and Oil.


Its recommended to have a mate help you as you may need an extra pair of hands.
Place the bike on your centre stand or front yoke stand.
First adjust the preload and wind it all the way out to take off any pressure from the springs.
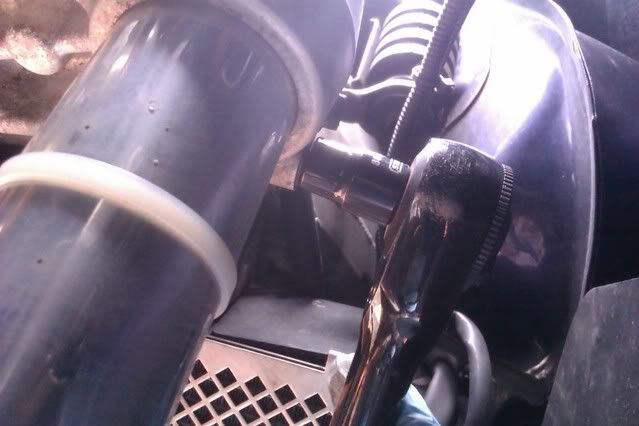
Using a 24mm Spanner, crack open the strut tops while they are being held by the yoke, just a couple of turns.


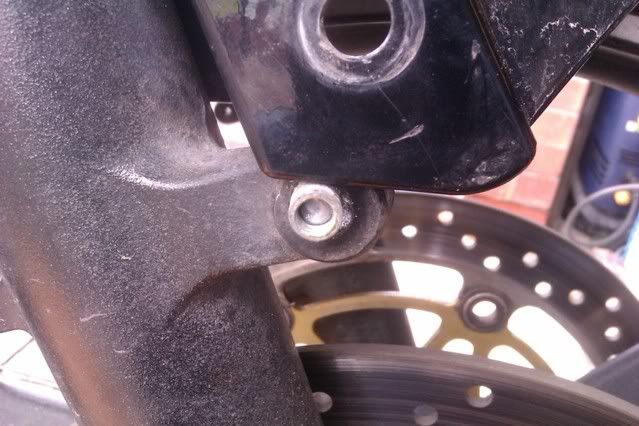
Next using a 14mm socket, remove the 2 bolts each side, securing each frohnt caliper on. After removing the 8mm bolts holding the brake lines to the forks, use a cable tie to hang the calipers out of the way safely.


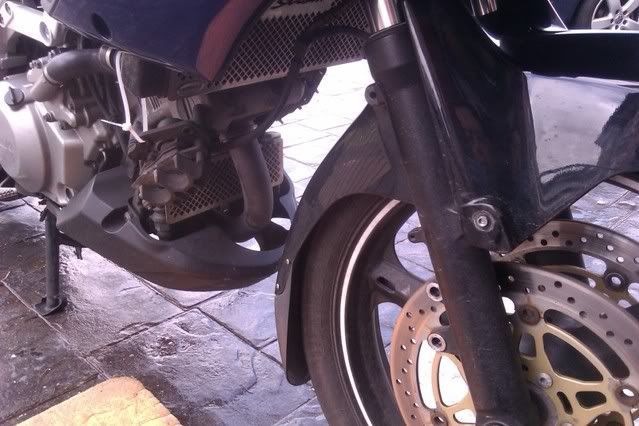
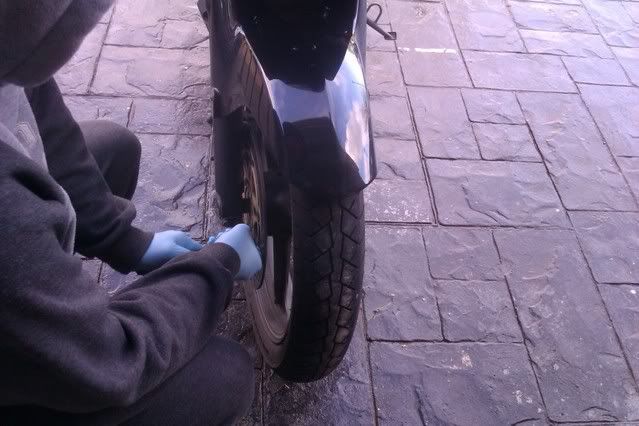
Now proceed to loosening the 10mm pinch bolts on the front right fork, then undo the front axle using an internal 19mm axle tool and remove the front wheel.


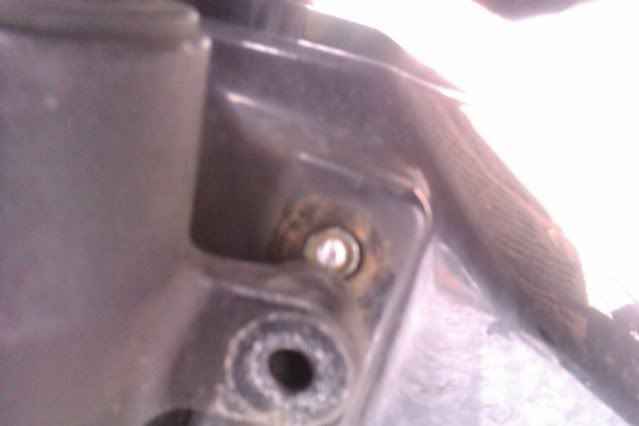
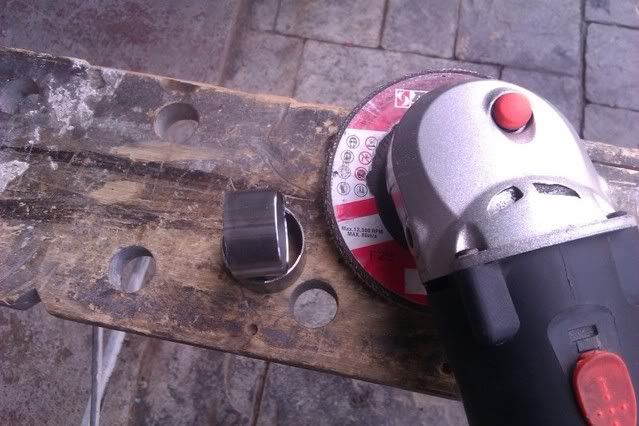
Then remove the remaining bolts either side securing the front mudguard to the forks. Be aware though, If your bike is anything like mine, you may have a couple of cheese bolts. I had to drill out and retap these buggers  ###


Squeeze the mudguard together slightly and remove.
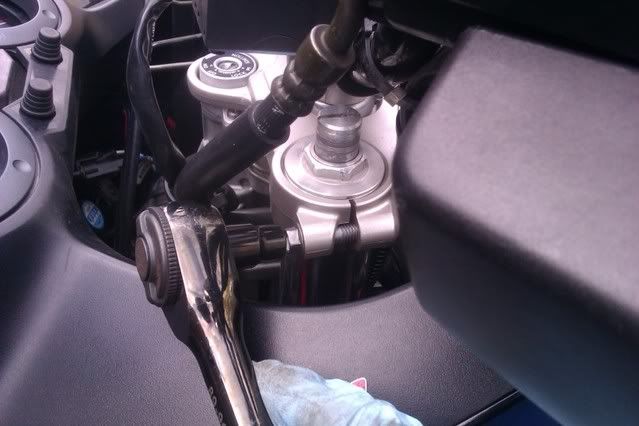
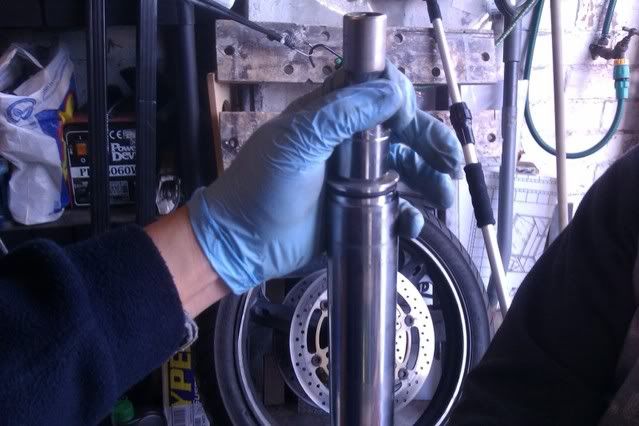
Now the forks are freed up at the bottom end, its time to drop them out. Using a 10mm socket, loosen the 2 lower yoke pinch bolts.


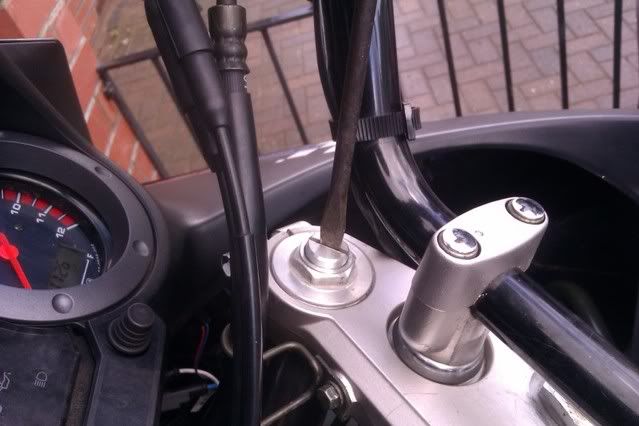
Next loosen the top yoke pinch bolt and be ready to catch the fork.


Now repeat for the other side.

To disassemble the fork, use a 24mm socket and apply downward as you remove the cap. The threads on the caps are very fine and you don't want the spring pressure blowing them out on those last few turns.


This next part may differ from K4 onwards but I'm not 100% sure.
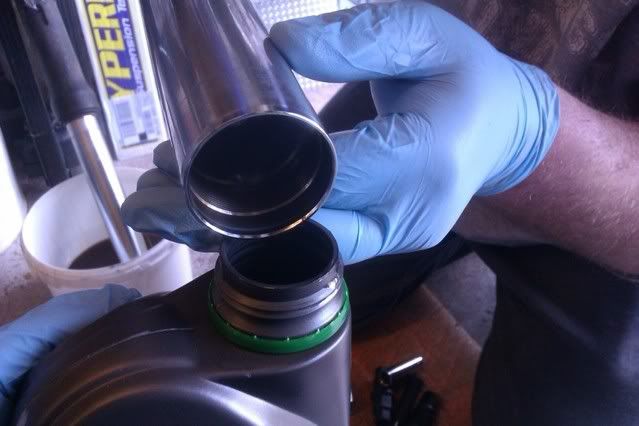
Once the cap is off, draw upwards the internals. On the centre shaft, you'll find this, top cap, lock nut, dished washer, spacer, flat washer, spring.


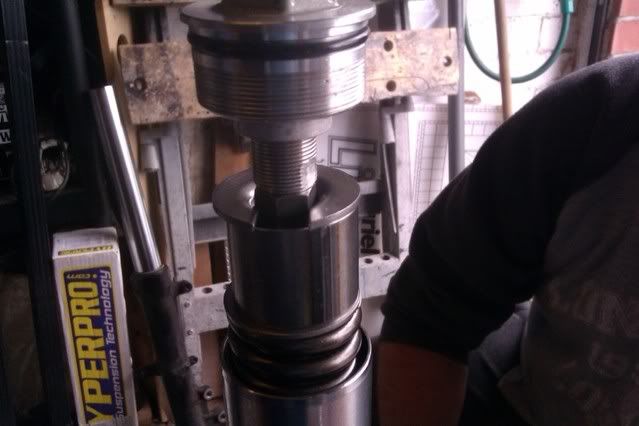
Using 2x 14mm spanners, loosen the lock nut against the bottom of the top cap. You may need to wind in the preload to expose the bottom threads. Either side of the threads you'll see a flat spot which is for your 14mm spanner. Once you've done this, you can remove the top cap, lock nut, dished washer, spacer, flat washer and spring.


Now its time to tip out the old oil. Give it a few pumps upside down and then leave it to drain off.


Repeat for the other side.
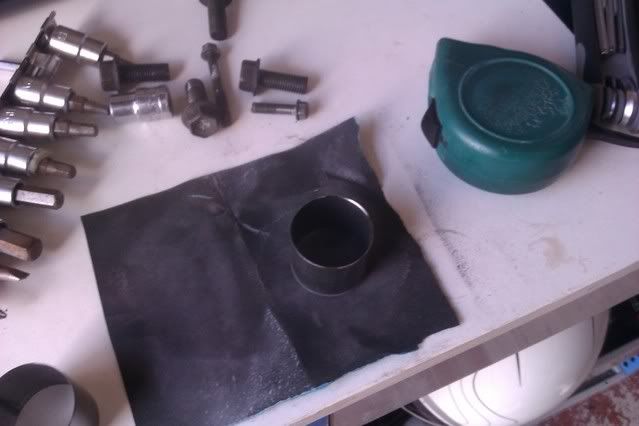
Once the old springs were off, I sized them up against my new ones. They were a tad shorter, 22mm in my case. New Spring - Top, Old Spring - Bottom


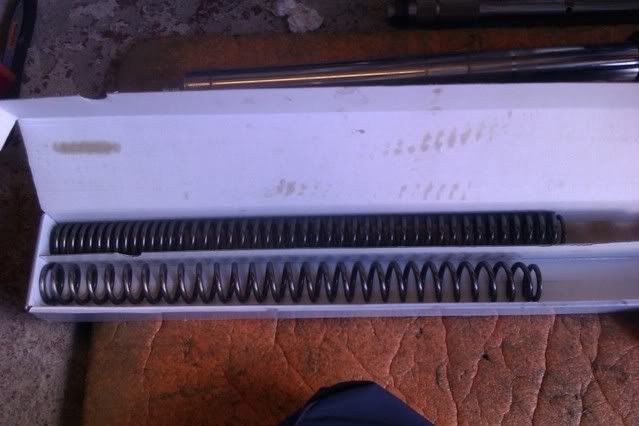
I was told to replace the spacer if the new spring was shorter than the combination of both the old spring and spacer. But before I could do that, I had to cut off 22mm from them, otherwise the overall length would be too long, which would mean the spring would be compressed as you installed it without even adjusting the preload.


After the spacer was cut down, I used some sandpaper on a flat surface and ran the cut edge of the spacer onto it to get a flat finish. Then a quick wipe down.


Time to fill the fork with oil. In the case of the K3, fill to 150mm air gap, so that 150mm from the oil level to the top of the fork stanchion when the fork is fully compressed. As you fill, remember to pump the fork and allow the oil to settle before you measure.


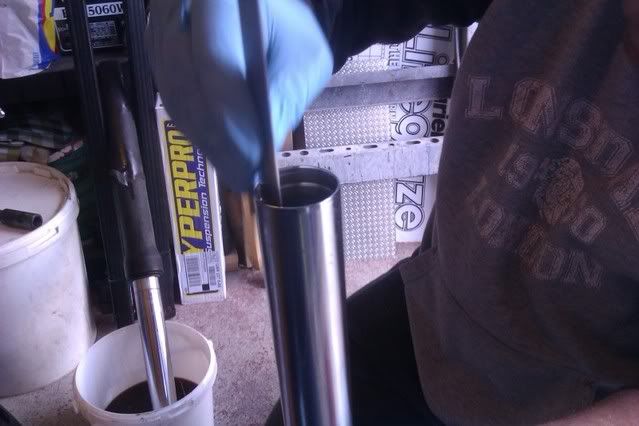
Keep adding little bits till it reaches your ruler. If you fill too much, then just pour some out.


Repeat for the other side.
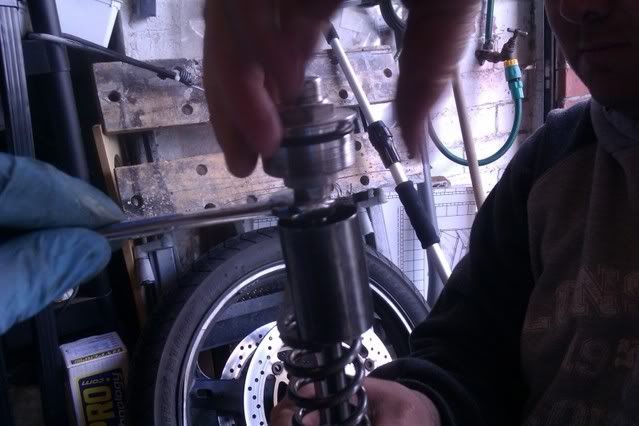
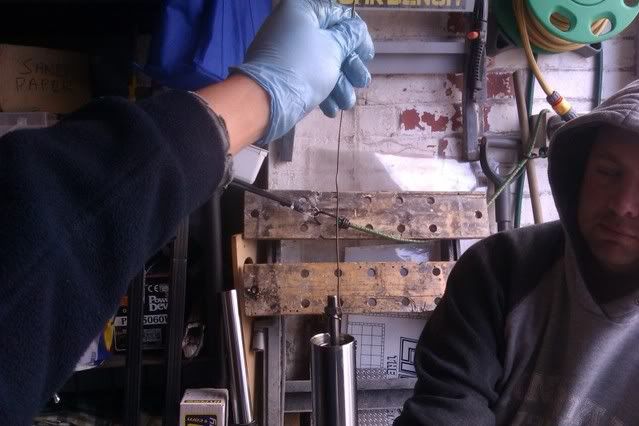
Now you have them both filled, you're ready to extend the stanchion, shaft and replace the new spring, however this is where it gets tricky. When you let go of the shaft to place the spring over it, it wants to drop down into the fork. To prevent this, use a bit of welding rod and wrap it around the lock nut. Use this to pass through your spring, washer and spacers ;) Also, you need to adjust the lock nut to the correct height. You need to measure 10.5mm from the top edge of the lock nut, to the top of the threaded shaft. In laymans terms, you need 10.5mm of exposed thread for the top cap to screw onto. I had enough slack to adjust this when I had all the bits back togather as per the next step.


Remember the order when refitting
Spring, flat washer, spacer, dished washer under the locknut, then top cap. Double check your 10.5mm of exposed threads before replacing the top cap. The lock nut and dished war will hold everything in place so don't worry. Use your 2x 14mm spanner and nip it tight.


Now using your 24mm socket, apply downward pressure and tighten up the top cap. You may want to unwind any preload if you have moved it previously. Just nip up the top cap for now.


Once the forks are back together, your ready to refit to the bike. This is just the reverse of above.
In short
replace forks flush to top yoke
nip up top yoke  pinch bolt
nip up bottom yoke pinch bolts
replace mudguard
replace wheel and axle
tighten axle pinch bolts
replace brake calipers
replace brakeline bolts
tighten top caps
tighten everything above to torque!

Tightening Torques
Yoke Pinch Bolts 23Nm
Front Axle 100 Nm
Front Axle Pinch bolts 23Nm
Caliper Bolts 39Nm
Fork Tops 20Nm


Now you need to setup the preload, search for threads on that.
If you mod it, They will come!
My current bike HERE.
My Old Vee

Offline MartinW

  • Administrator
  • Member
  • *****
  • Joined: Jan 2012
  • Posts: 12988
  • Bike: DL650 K4 Blue
  • Location: Swindon
Re: KevShek' DL1000 K3 - with Mods & How To's
« Reply #66 on: April 15, 2012, 21:16:43 »
Another great "how to" Kevshek - Keep them coming.

In this case it would only re-inforce my "get someone else to do that" attitude - Looks too scary for me.
Tall, Dark and Handsome (In 1987) - Just tall now !!

Chief Stasi


Offline Juvecu

  • Member
  • ***
  • Joined: May 2009
  • Posts: 13454
  • Eat, Sleep, Ride, Repeat
  • Bike: '11 Versys 650 & '05 TT-R250
  • Location: Ryton-On-Dunsmore
Re: KevShek' DL1000 K3 - with Mods & How To's
« Reply #67 on: April 15, 2012, 22:38:53 »
Ace write up and nice pics with it too :thumb:

Just one thing to think about: Your new spring has much more windings on it which is much closer spaced together than the old spring and it's also longer. This means it's made out of more metal than the old spring and it will displace more oil in the fork when you put it in. Less spacer length also means less air space it makes on top of the spring. It might mean that you need to put in less oil (measure a bigger air gap) to compensate for this to end up with the oil at the same level as with the stock springs and to have more or less the same air gap. A rough guess would be to leave 25mm more air gap for aftermarket springs, just my feel on it though. I'm not saying you should change it, but if you have problems later you can consider this as a cause if the logic adds up.

Another thing worth mentioning (it's something I didn't know when I did mine first) is that if your springs are dual rate or progressive they will have windings closer together on one end of the spring, this is the end that goes into the tube [s:gyk4bsvo]first[/s:gyk4bsvo] last when you put them in. In other words, tight windings to the [s:gyk4bsvo]bottom[/s:gyk4bsvo] top. [s:gyk4bsvo]IIRC it's the other way around for the rear shock though.[/s:gyk4bsvo]

Edit: To correct technical mistakes.
Members Map                                                    Juv's Strom "Restoration" (sold to Mad Phil)
Juv & Locky's Morocco Trip Report                   Juv's Blog

Offline kevshek

  • Member
  • ***
  • Joined: Feb 2012
  • Posts: 320
Re: KevShek' DL1000 K3 - with Mods & How To's
« Reply #68 on: April 15, 2012, 23:04:03 »
Juv the new spring in are now technically the same length as before, as I've cut down the spacer, however, on initial setup, I've found that the preload adjustment is down to the last mark before full preload. This means that I could possibly do with a slight longer spacer. When we first put the fork back together, there wasn't any presuure on the top cap, and it was easy to reinstall. I'm going to leave it for the time being, untill I've had a good ride and I'm also testing the ammount of travel by way of a cable tie on the fork stanchion, to see if I may need a bigger spacer.

These hagon springs are tight coils to the top where the air gap is, Ill need to check, but it could be the rear is tight coils to the bottom.
If you mod it, They will come!
My current bike HERE.
My Old Vee

Offline Juvecu

  • Member
  • ***
  • Joined: May 2009
  • Posts: 13454
  • Eat, Sleep, Ride, Repeat
  • Bike: '11 Versys 650 & '05 TT-R250
  • Location: Ryton-On-Dunsmore
Re: KevShek' DL1000 K3 - with Mods & How To's
« Reply #69 on: April 16, 2012, 11:12:08 »
I'm not on about the total length, I'm on about the amount of metal involved that's displacing oil when you insert them into the forks. If you filled both forks to the same level with oil, then put a new spring in one and an old spring in another the fork with the new spring would have a higher oil level because there's more physical metal in the new spring. Don't forget to shout "Eureka!" :)

I guess you could look at it in another way to understand it better: if you could unwind the old and the new spring so you have one long metal rod, the new one would be quite a bit longer because it has more coils compared to the old one. That extra metal on the new one displaces more oil and raises the oil level.

In the end, if it doesn't cause you any trouble it's not worth worrying about it.

As for the which way the tight coils should go, I had it the wrong way around, I will edit my earlier post to reflect this. Tight coils upwards both ends. This means I need to take my forks off again, I put them in the wrong way around 2 weekends ago :bawl:
Members Map                                                    Juv's Strom "Restoration" (sold to Mad Phil)
Juv & Locky's Morocco Trip Report                   Juv's Blog

Offline kevshek

  • Member
  • ***
  • Joined: Feb 2012
  • Posts: 320
Re: KevShek' DL1000 K3 - with Mods & How To's
« Reply #70 on: April 16, 2012, 11:32:55 »
I know what you mean about the oil displacement, but in theory, providing the tight coils are at the top, hagon would and should have accounted for the oil level when they instructed to use 150mm air gap.
If you mod it, They will come!
My current bike HERE.
My Old Vee

Offline Juvecu

  • Member
  • ***
  • Joined: May 2009
  • Posts: 13454
  • Eat, Sleep, Ride, Repeat
  • Bike: '11 Versys 650 & '05 TT-R250
  • Location: Ryton-On-Dunsmore
Re: KevShek' DL1000 K3 - with Mods & How To's
« Reply #71 on: April 16, 2012, 11:35:21 »
Ah, 150mm is what they recommended and not the standard, I see :thumb: I was under the impression (read: daftly assumed :shy: ) that 150mm was the standard.
Members Map                                                    Juv's Strom "Restoration" (sold to Mad Phil)
Juv & Locky's Morocco Trip Report                   Juv's Blog

Offline kevshek

  • Member
  • ***
  • Joined: Feb 2012
  • Posts: 320
Re: KevShek' DL1000 K3 - with Mods & How To's
« Reply #72 on: April 16, 2012, 12:53:07 »
nah, its their spec. I think the standard was about 133mm or something daft like that. I remember glancing at it when I refered to the manual for torque settings.
If you mod it, They will come!
My current bike HERE.
My Old Vee

Offline Gassoon

  • Quotes Museum Curator & Moderator
  • Member
  • ****
  • Joined: Jan 2010
  • Posts: 8183
  • Bike: DL650X L7
  • Location: Tyneside
Re: KevShek' DL1000 K3 - with Mods & How To's
« Reply #73 on: April 16, 2012, 15:13:16 »
Great write-up and photos kev  :grin:  :thumb:
"I am a dignified citizen of the area, not a fox-faced vagabond in an over-fancy hat!"

Work Experience Stasi


Offline kevshek

  • Member
  • ***
  • Joined: Feb 2012
  • Posts: 320
Re: KevShek' DL1000 K3 - with Mods & How To's
« Reply #74 on: April 16, 2012, 18:10:28 »
16) Hyperpro Rear Spring

This is the Hyperpro replacement spring, come with a good set of technical instructions showing you how to setup your dampner when your done.


First off, with the bike up on a centre stand, remove the preload adjuster via the 2x 10mm bolts. Be careful of the cheesy bolts, may pay you to squirt the rear of the bolts/adjuster with some WD40 prior to undoing them. Then unclip the rubber hose from the retainer.


Next, the 2x 17mm nuts holding the lower dog bone links need to be removed. The bolt head on the left side of the bike will require a 14mm spanner to stop them from spinning, while you undo the 17mm nuts.


Remove the lower bolt and right side dog bone link, leaving the left side link and top bolt in situ. You won't need to remove it plus the exhaust stop you from doing it anyways. You may need to lift the rear wheel slightly to take the weight off the links/bolt as you pull it free.


Take the opportunity to remove the sleeve or bearing tube which the bolt sit in, you can clean out the bearings with WD40 and then re grease the bearing. You may also need to rest the rear wheel on some wood, it just keeps the suspension linkages out of the way.


With the right side link out the way, you can remove the lower strut bolt, this is a 14mm nut on the right, and 12mm bolt head on the left side.


Once the bolt is out, just pull the lower link down and swing it forward out of the way. Again, you can clean the bearing tube, bearing and re grease while you're there.


Last step is to remove the top struct bolt, this is like the bottom, 14mm nut, 12mm head.


Finally, the struct can come out, however, mine was a bit tight at the top and needed a bit of encouragement from a pry bar. **The top bushing on the strut was a touch too wide so I filed it down a touch so reinstlling it was easier.**


Pass the strut downward and follow it by the preload adjuster and out it comes.


Heres the std shock next to the new spring.


In order to swap out the spring, you need something to compress it, I took it to a local garage who had the correct gear to do it, but heres the jist of it. This small hole houses a tiny allen screw. Mark the orientation of the grub screw against the body of the strut.


Once the spring is compressed, the preload collar will be free to move/spin (hence why you've marked it as above) When the collar is moved down, it exposes a clip which sits in a groove around the strut body, simple remove the clip using a small screw driver, then pass the collar up over and out of the strut. The spring tension can then be released and again removed from the strut.


When refitting the new Hyprepro spring, its TIGHT COILS to the TOP
The refitting procedure is just the reverse of the above.


Torque Settings
Top/Bottom Strut Bolts 50Nm
Dog Bone Link Bolts 78Nm
If you mod it, They will come!
My current bike HERE.
My Old Vee

Offline kevshek

  • Member
  • ***
  • Joined: Feb 2012
  • Posts: 320
Re: KevShek' DL1000 K3 - with Mods & How To's
« Reply #75 on: April 16, 2012, 18:18:10 »
Verdict on Hagon Front and Hyperpro Rear Spring

After I setup the preload adjustment I took her out for a 30 mile ride. The ride is much much better, the bike feels solid on the road, changing direction feels more positive. There is less suspension travel, around 85mm now on the front whereas it was in excess of 100mm before, and I did even go up and down a kerb or 2 today as I had an errand to run while I was out. To sum it up, the bike feels great!
If you mod it, They will come!
My current bike HERE.
My Old Vee

Offline kevshek

  • Member
  • ***
  • Joined: Feb 2012
  • Posts: 320
Re: KevShek' DL1000 K3 - with Mods & How To's
« Reply #76 on: April 17, 2012, 15:51:08 »
17) Kappa 46 Zippy Top Box

Bought this Kappa 46 ltrs Monokey Top Box offa ebay for £62 posted, comes with the top rack and back rest, bargain! I just bolted it to the Suzuki rack.
Thus completing my luggage set.


If you mod it, They will come!
My current bike HERE.
My Old Vee

Offline Juvecu

  • Member
  • ***
  • Joined: May 2009
  • Posts: 13454
  • Eat, Sleep, Ride, Repeat
  • Bike: '11 Versys 650 & '05 TT-R250
  • Location: Ryton-On-Dunsmore
Re: KevShek' DL1000 K3 - with Mods & How To's
« Reply #77 on: April 17, 2012, 15:58:08 »
Looks like it suffers from the common V-Strom problem, the box encroaches on the pillion's space.

ps. What happened to the rabbit pictures that were up a moment ago? Or have I gone :crazy: ?
Members Map                                                    Juv's Strom "Restoration" (sold to Mad Phil)
Juv & Locky's Morocco Trip Report                   Juv's Blog

Offline kevshek

  • Member
  • ***
  • Joined: Feb 2012
  • Posts: 320
Re: KevShek' DL1000 K3 - with Mods & How To's
« Reply #78 on: April 17, 2012, 16:11:29 »
If you look at the side on pic, you'll see that I didn't remove the Suzuki top box latch, actually, I couldn't cos they were seized so I left it on when they owder coated it. I could of removed it and then fit the box further back, but I'm happy with the way it is.

The rabbit pics in the other thread, but ill stick one on here for good measures  :)
Cheese!
If you mod it, They will come!
My current bike HERE.
My Old Vee

Offline kevshek

  • Member
  • ***
  • Joined: Feb 2012
  • Posts: 320
Re: KevShek' DL1000 K3 - with Mods & How To's
« Reply #79 on: April 18, 2012, 21:47:29 »
18) Custom top box lighting

I'm that bored and just can't leave my bike alone, so I decided to tackle making my own rear brake light for my top box. Givi and Kappa both do light kits for certain models of boxes, mine is one of them but as its older, no one in the uk has stocks of the lights. As I already had leds lying around and I'm canny handy with a soldering iron, I thought I may as well do it.

First off, I removed the centre plate on the top box.


This has a built in space ready to accept kappas light kit.


After removing the cover, I measured and cut out a bit of bread board left over from the yoshi box project.


After drilling 2 screw holes, I set about laying out a configuration of LEDs to suit the space I had. I opted to run them in sets of 3 with a resistor in each set. Next was the hard bit of soldering  it all together.


And here's the boy tested and working.


I had a couple of LED strip light, amber in colour, left over from a previous project, so decided I was going to incorporate them into the box too. So while the side covers were off, I trimmed them down to length and stick them along the bottom edge where the trim goes. Lucky for me, there is just enough gap behind the covers to house these.


Here's a quick test.


The next challenge was to come up with an idea to keep the boxes quick release function. This meant I had to come up with some form of contact  system. After a bit of head scratching and a trip to maplins, I picked up a 10 AA battery box, some 6 core alarm cable and dug out some pop rivets. Can you guess what it is yet?


After checking for clearance and alignment issues, I drill 5 holes and fixed 5 rivets onto the top of the monokey mount cover.
Why 5? Stop, tail, left indicator, right indicator  and earth.


On the underside, I crimped 5 ring terminals to the 6 core, doubling up on the earth, these were fixed to the bottom of each rivet.


With the base plate done, I now had to mark my 5 contact points on the bottom of the top box. To do this, I used a small self taper and a bit of blue tak, press in down on the top box to leave a mark.


I then removed  the spring contacts from the battery box I bought.


Using one of the spare contacts, I heated it up and pressed it onto the surface thus leaving a mark for its location but more importantly, a slight recess for it to sit into, preventing it from moving out of alignment. I then drilled a hole and rivetted it down.


As with the base plate, I riveted the contacts to crimps which I prewired to correspond.


Here's a test fit, the mating of the 2 surfaces.


Finally the arduous task of wiring everything together and keeping it neat. I won't bore you with too much of that but will just mention that on the bike side of things, all your wiring can be found on the rear light harness accessible by reaching back under the seat.


Only thing I need to do is to decide on what tail light I'm going to buy/fit and then wire that into the box. All the wiring is done.
Here's a short video on the results.
If you mod it, They will come!
My current bike HERE.
My Old Vee