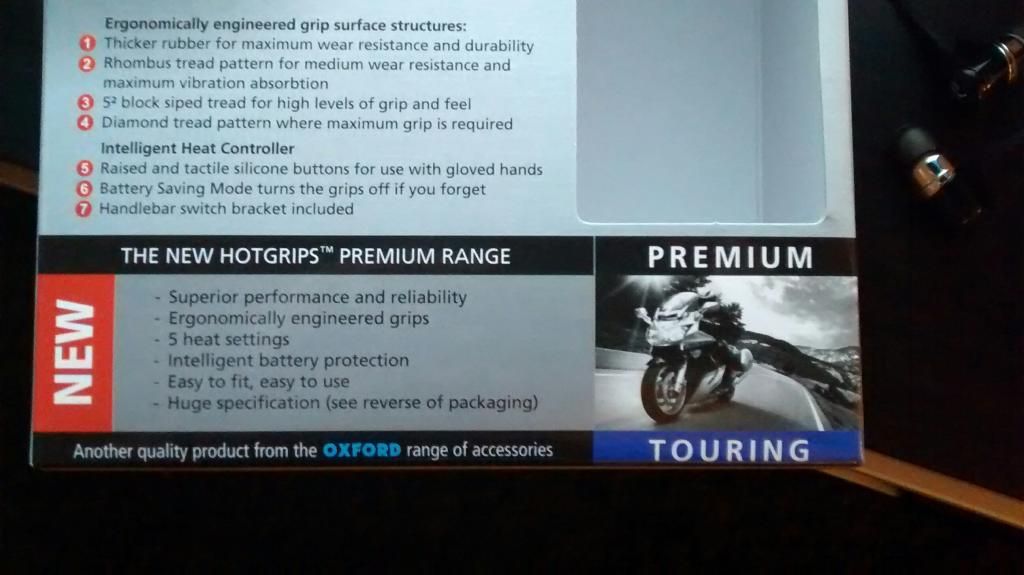
So last night I installed my Oxford Premium Touring heated Grips
It took 2 and half hours to install. Could have become that time down but I ran an additional line for power to the 12V Usb Connector at the front so that put some extra time on this job.
This is the box
Current Left Grip
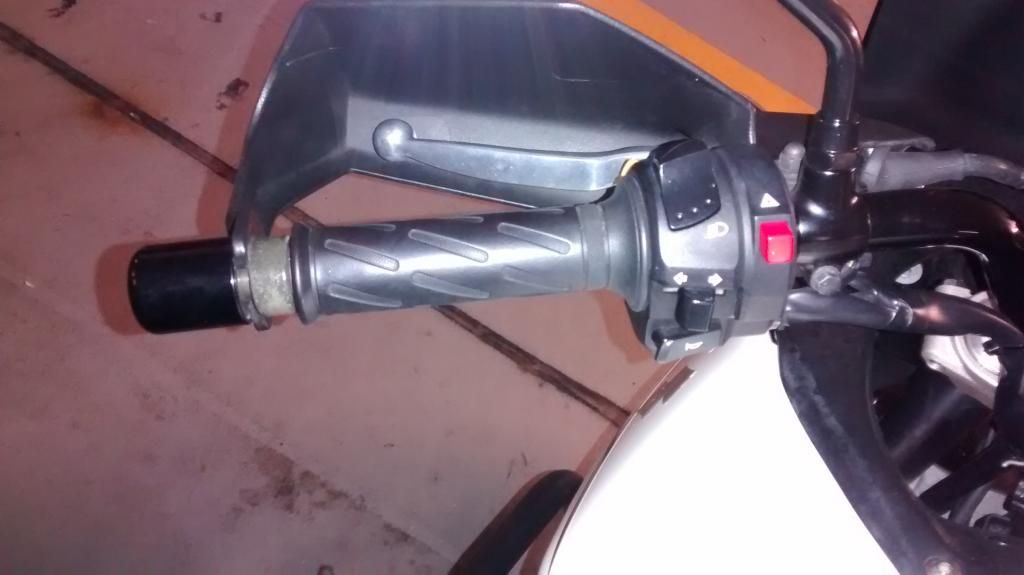
Current Right Grip

The first step was to remove the End Weights, protectors and move the Hand Guards to the side. There is a Philips Head Screw a the end of each bar, remove it with philips head screwdriver. The screw is reasonably long about 40mm so will take a number of turns to come off. Once screw is off then pull the weighted protector ends off. Put to side.
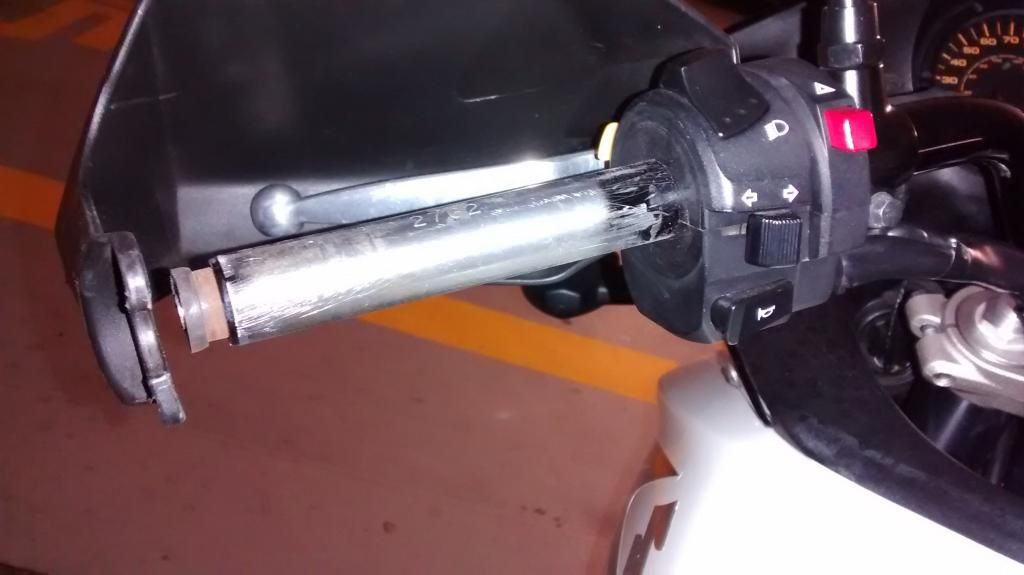
The Clutch Side Grip is easier to remove as it doesn't have ridges or plastic stop ends to remove it. With a thin flat head screw driver stick it under the grip surface. Slid the screwdriver under the grip until its at the end. Then rotate it under the grip around the circumference of the handlebar. do this several times as it removes the glue underneath. With the screwdriver still under the grip twist the grip with one hand and pull it away. Keep winding it backwards while twisting and the grip should come right off.
Clean down the glue with some sandpaper or else a blunted knife.
Result
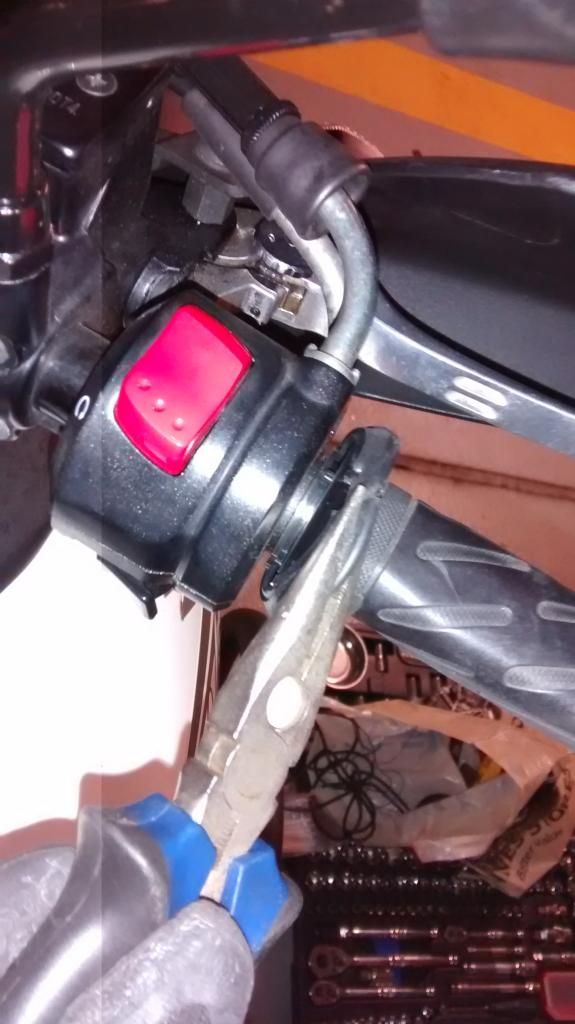
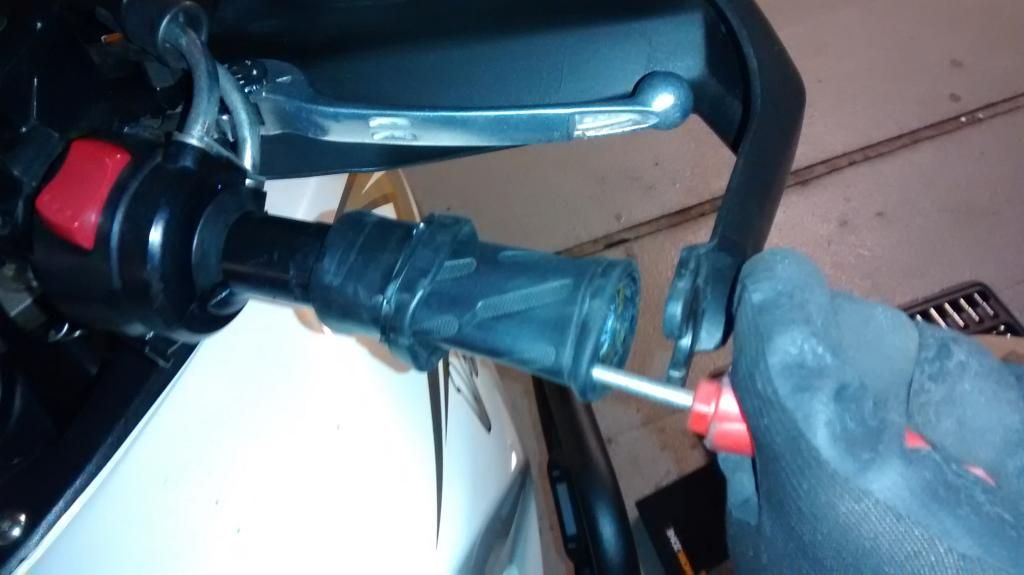
Right Side Throttle Grip.
First you have to pull the grip away from the end part of the throttle. The grip is wrapped on the end plastic retainer and pulls aways from the throttle as below.
Repeat the same thing as the other side, See below
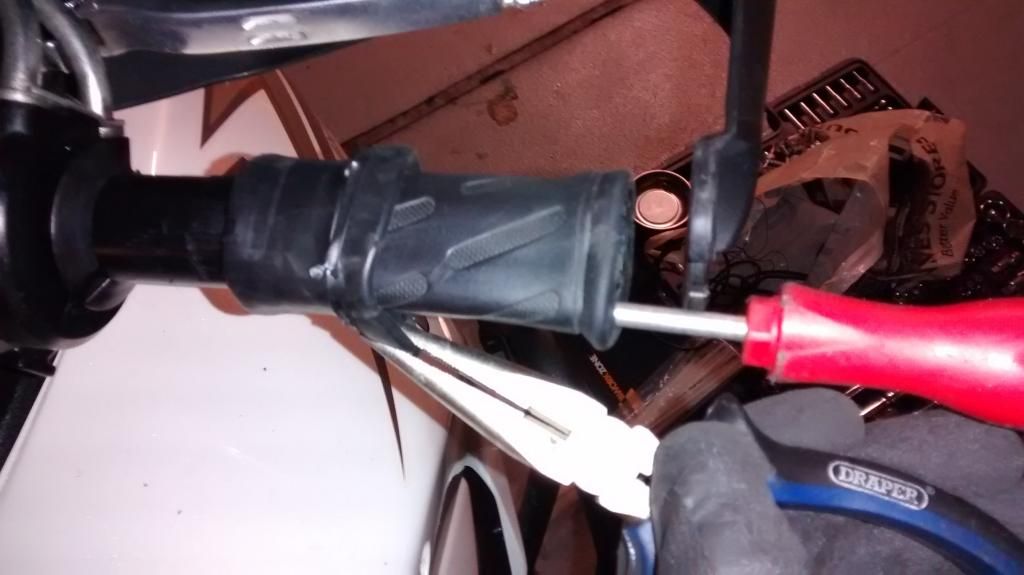
The Throttle has ridges all around it to prevent the grip turning around the throttle and slipping. The end has as plastic retain ridge also
I pulled the end of the grip off with pliers, but it got so far down that it would not move so cut with knife and came off immediately
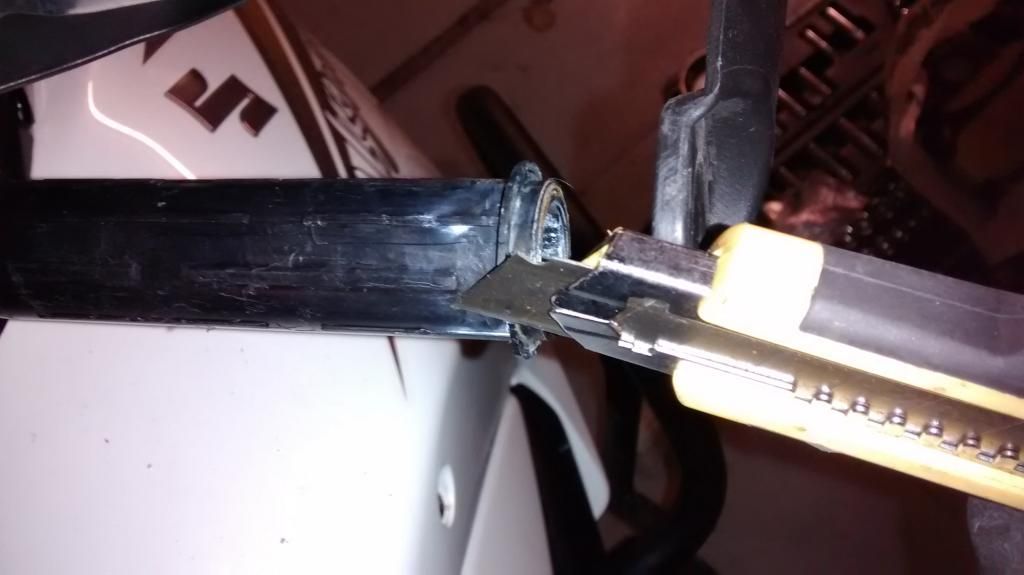
The ridge is easy to remove with a sharp stanley blade. It has to be cut away completely do the oxfords will slide on the end. The oxfords are far more rigid than the originals with no give.
Removing end with knife
Clean up the throttle side with cloth. You may wish to also remove the plastic ring on the other end of the throttle (beside the ignition) As this pushes the Oxford grip further away from the ignition end. But it is not 100% necessary.
You can dry test fit the grips on and you can get them off again with a bit of tug. There is arrows on each Grip facing down where the power to the grip comes in. Point the arrow down during test fit and make sure that the power cable does not interfere with Brakes, Clutch or anything else. Especially the Throttle side when fully turned.
If you are happy with where you want them. remove the grip. And one at a time fit them. I used Hair Spray to install them. There is glue supplied but it is not easy to work with. The hairspray is good because it lubricates the handlebar during install and doesn't set quick. It sets after a few hours and also will set with the heat of the grips later on. So I would recommend this method. Glue is not necessary at all on the Throttle side as the grips will hold it still.
On the clutch side I did put a drop of glue around the inner side of the handlebar ( about 10 mm from the indicator stalk) around the circumference. The glue is in the same position as the original grip. There is not need to go crazy with the glue the hair spray does its job very well. The glue is just for added security to prevent movement.
Once grips are on let them set for a while. You can then route the cables. I ran the power to my spare relay feed 5amp fused. The cable runs behind the frame under the right side of the fuel tank, I used electrical tape along it to make sure it was snug with existing cabling. It comes out just over the radiator at the front and up to the front of the frame to connect with the left right and controller connectors. Test everything power wise prior to putting it all back together. (I don't have pics of the tank removal but they should be available on the site)
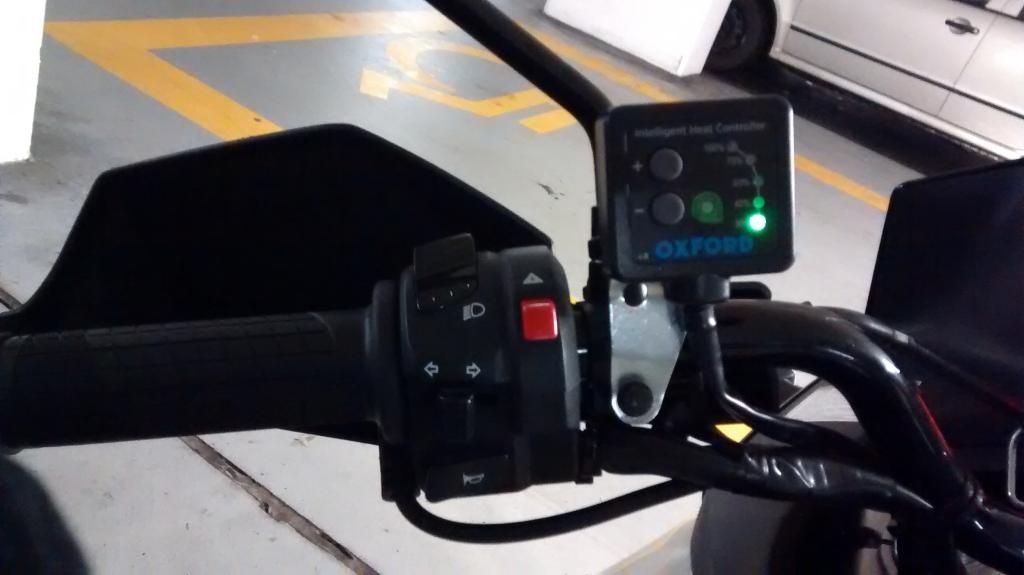
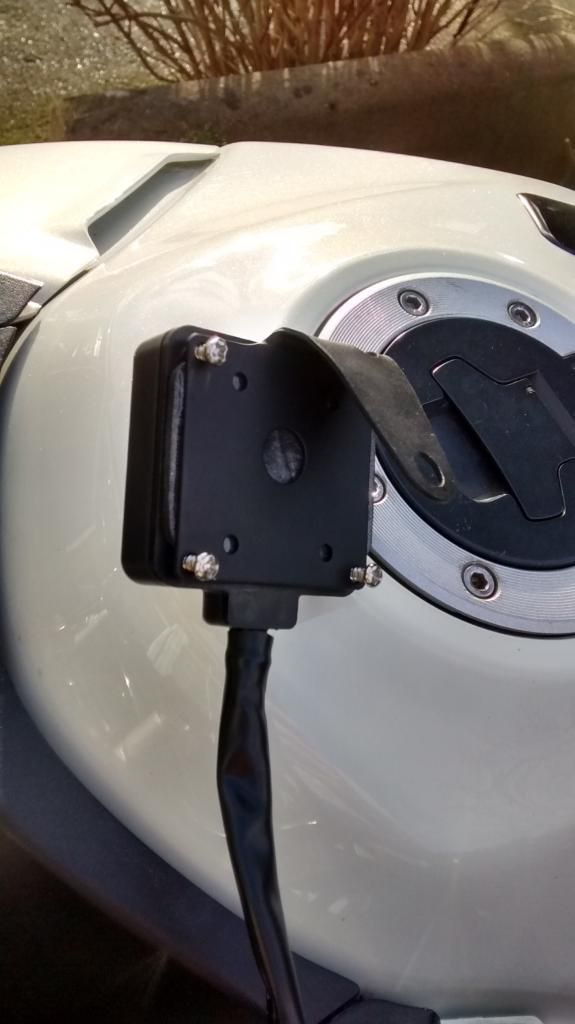
Controller first fit. Its held in place with single screw from the mirror mount.
And that is it installed. Some tidying up to do with cable ties but all working.
So next day decided I hated the colour of the bracket, and I was not fond of the high position.
First Sprayed it black to match the rest of the equipment.
I also bend the bracket over to allow the controller to sit lower and more parallel to the various controllers on the clutch side.
Controller with bracket, its held on with double sided tape and 4 screws, the double sided tape should act as a vibration barrier for the electronic board of the controller
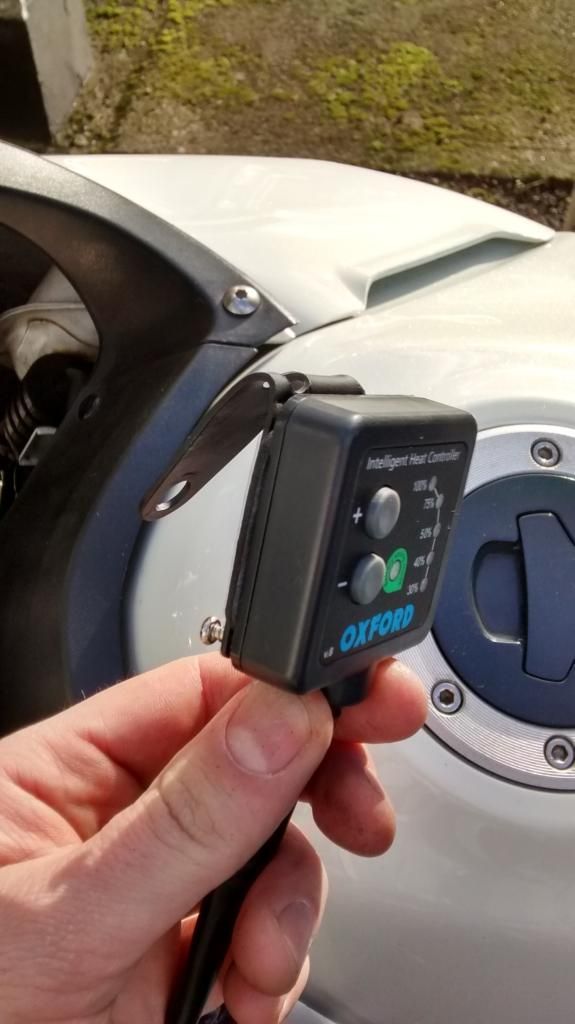
Controller installed
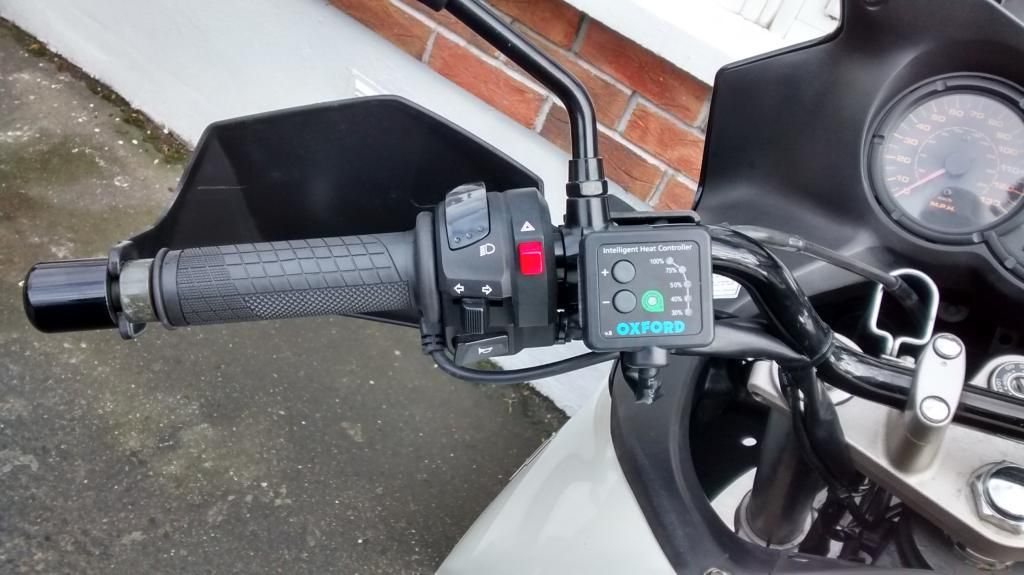
Throttle grip installed

